Fine Art Print : Battle of Biddulphsberg


![]()
Fine Art Prints from Mary Evans Picture Library
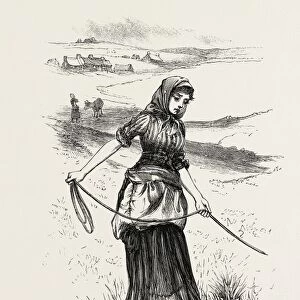
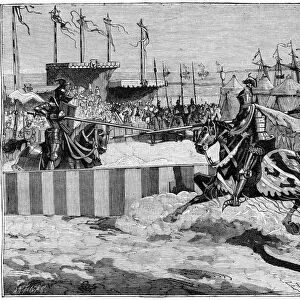
Battle of Biddulphsberg
BIDDULPHSBERG A British cavalry force crossing the veldt is attacked by the Boers from the high ground
Mary Evans Picture Library makes available wonderful images created for people to enjoy over the centuries
Media ID 615335
© Mary Evans Picture Library 2015 - https://copyrighthub.org/s0/hub1/creation/maryevans/MaryEvansPictureID/10097492
Attacked Boer Boers Cavalry Crossing Veldt
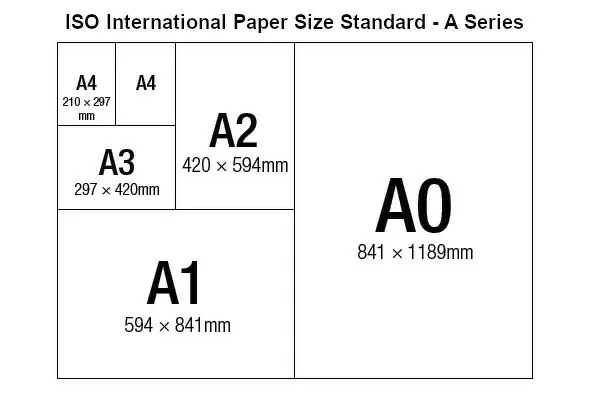
A2 (42x59cm) Fine Art Print
Experience the thrill of history with our exquisite selection from the Media Storehouse range of Fine Art Prints. This captivating image, titled "Battle of Biddulphsberg," transports you back in time to the heat of the conflict between British cavalry and the Boers. The dynamic composition, expertly captured by Mary Evans Picture Library from Mary Evans Prints Online, showcases the raw energy and tension of the battlefield. Each print is meticulously produced using the highest quality materials, ensuring a stunning and vibrant display that adds character and depth to any space. Bring history to life with this beautiful and intriguing piece of art.
Our Fine Art Prints are printed on 100% acid free, PH neutral paper with archival properties. This printing method is used by museums and art collections to exhibit photographs and art reproductions. Hahnemühle certified studio for digital fine art printing. Printed on 308gsm Photo Rag Paper.
Our fine art prints are high-quality prints made using a paper called Photo Rag. This 100% cotton rag fibre paper is known for its exceptional image sharpness, rich colors, and high level of detail, making it a popular choice for professional photographers and artists. Photo rag paper is our clear recommendation for a fine art paper print. If you can afford to spend more on a higher quality paper, then Photo Rag is our clear recommendation for a fine art paper print.
Estimated Product Size is 59.4cm x 42cm (23.4" x 16.5")
These are individually made so all sizes are approximate
Artwork printed orientated as per the preview above, with landscape (horizontal) orientation to match the source image.
EDITORS COMMENTS
This evocative photograph captures a pivotal moment in the Second Boer War (1899-1902), as a British cavalry force, numbering approximately 28 men, crosses the vast and open veldt of South Africa. The scene is set at Biddulphsberg, a strategic location where the Boer forces, hidden in the high ground, launch a surprise attack on the unsuspecting British riders. The Second Boer War was a bitter and protracted conflict between the British Empire and the two independent Boer states, the Transvaal and the Orange Free State. The war began in October 1899, following years of tension between the Boers and the British over mineral rights and political control. The Battle of Biddulphsberg took place on February 16, 1900, during the early stages of the war. The British, under the command of Lieutenant Colonel C.S. Elliott, were on a reconnaissance mission when they were ambushed by the Boers. The high ground, which provided the Boers with a commanding view of the battlefield, proved to be a significant advantage. Despite being outnumbered and outgunned, the British cavalry fought valiantly, managing to hold their ground for several hours before being forced to retreat. The battle resulted in heavy casualties for both sides, with the British losing around 15 men and the Boers around 20. This photograph offers a glimpse into the harsh realities of war in the African veldt, with the open landscape and the stark contrast between the British in their uniforms and the Boers in their traditional attire, highlighting the cultural and political divisions that fueled the conflict. The image serves as a poignant reminder of the sacrifices made during this often-forgotten chapter of history.
MADE IN THE UK
Safe Shipping with 30 Day Money Back Guarantee
FREE PERSONALISATION*
We are proud to offer a range of customisation features including Personalised Captions, Color Filters and Picture Zoom Tools
SECURE PAYMENTS
We happily accept a wide range of payment options so you can pay for the things you need in the way that is most convenient for you
* Options may vary by product and licensing agreement. Zoomed Pictures can be adjusted in the Basket.