Fine Art Print > Animals > Mammals > Muridae > House Mouse
Fine Art Print : The Adventure of the Empty House, Sherlock Holmes


![]()
Fine Art Prints from Mary Evans Picture Library
The Adventure of the Empty House, Sherlock Holmes
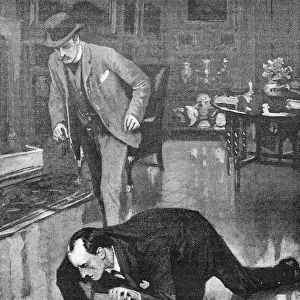
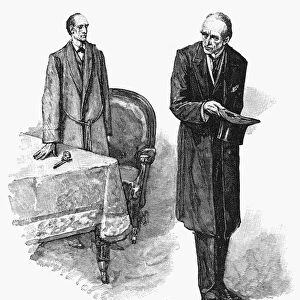
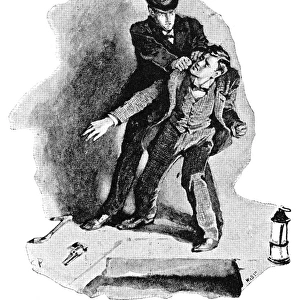
The Return of Sherlock Holmes, the Adventure of the Empty House, a Sherlock Holmes story by Arthur Conan Doyle. " Colonel Moran sprang forward, with a snarl of rage." The furious Colonel is held back by two policemen a few paces from Holmes. Date: 1903
Mary Evans Picture Library makes available wonderful images created for people to enjoy over the centuries
Media ID 14306910
© Mary Evans Picture Library
Adventure Arthur Colonel Conan Doyle Empty Forward Furious Held Holmes Moran Paget Policemen Rage Return Sherlock Sidney Snarl Sprang
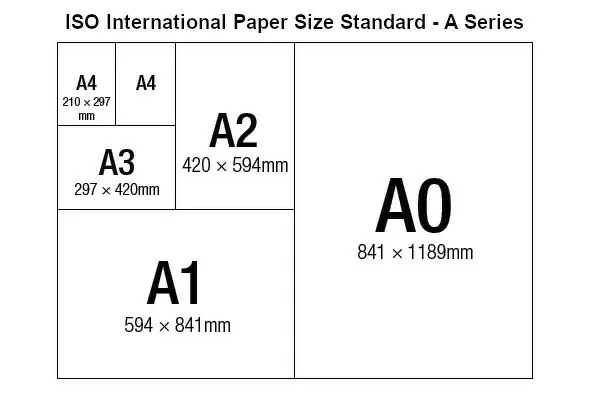
A2 (42x59cm) Fine Art Print
Experience the thrilling return of the world's greatest detective with our exquisite range of Fine Art Prints from Media Storehouse. This captivating image, taken from The Adventure of the Empty House by Mary Evans Prints Online, showcases a pivotal moment in Sir Arthur Conan Doyle's iconic story, The Return of Sherlock Holmes. Witness the shock and surprise as Colonel Moran leaps forward, unaware that the man he believed to have killed, the legendary Sherlock Holmes, has returned. Bring the mystery and intrigue of the beloved detective to your home or office with these stunning, high-quality prints. Each print is meticulously reproduced from original sources, ensuring the finest details and authenticity. Elevate your space with a piece of literary history and add a touch of sophistication to your décor. Order now and let the adventure begin.
Our Fine Art Prints are printed on 100% acid free, PH neutral paper with archival properties. This printing method is used by museums and art collections to exhibit photographs and art reproductions. Hahnemühle certified studio for digital fine art printing. Printed on 308gsm Photo Rag Paper.
Our fine art prints are high-quality prints made using a paper called Photo Rag. This 100% cotton rag fibre paper is known for its exceptional image sharpness, rich colors, and high level of detail, making it a popular choice for professional photographers and artists. Photo rag paper is our clear recommendation for a fine art paper print. If you can afford to spend more on a higher quality paper, then Photo Rag is our clear recommendation for a fine art paper print.
Estimated Image Size (if not cropped) is 42cm x 44.4cm (16.5" x 17.5")
Estimated Product Size is 42cm x 59.4cm (16.5" x 23.4")
These are individually made so all sizes are approximate
Artwork printed orientated as per the preview above, with portrait (vertical) orientation to match the source image.
FEATURES IN THESE COLLECTIONS
> Animals
> Mammals
> Muridae
> House Mouse
> Popular Themes
> Sherlock Holmes
The Adventure of the Empty House,
EDITORS COMMENTS
a captivating tale from Arthur Conan Doyle's "The Return of Sherlock Holmes," comes to life in this evocative photograph. The image, dated 1903, captures the intensity and drama of a pivotal moment in the story. At the center of the scene, Colonel Moran, a formidable adversary of the legendary detective Sherlock Holmes, is shown in a state of uncontrollable rage. With a snarl on his face, he lunges forward, his clenched fists raised, ready to strike. The colonel's fury is palpable, driven by his deep-seated desire for revenge against the man who had outwitted him time and time again. However, the colonel's advance is halted by two determined policemen, who firmly hold him back, maintaining a safe distance from the infamous detective. The tension in the scene is palpable, as the outcome of this confrontation remains uncertain. This historical photograph, featuring the iconic figures of Sherlock Holmes and Colonel Moran, is a testament to the enduring appeal of Conan Doyle's masterful storytelling. The image, sourced from Mary Evans Prints Online, offers a glimpse into the rich history of detective fiction and the complex relationship between the brilliant detective and his formidable adversaries. Sidney Paget, the renowned illustrator who brought Sherlock Holmes to life through his illustrations in The Strand Magazine, is believed to have inspired this photograph. Paget's illustrations, which accompanied Conan Doyle's stories, are considered an integral part of the Holmes canon and continue to captivate audiences around the world. This photograph is not only a fascinating historical document but also a visual representation of the timeless appeal of Sherlock Holmes and his adventures. It invites us to explore the depths of Conan Doyle's intriguing stories and the complex characters that inhabit them.
MADE IN THE UK
Safe Shipping with 30 Day Money Back Guarantee
FREE PERSONALISATION*
We are proud to offer a range of customisation features including Personalised Captions, Color Filters and Picture Zoom Tools
SECURE PAYMENTS
We happily accept a wide range of payment options so you can pay for the things you need in the way that is most convenient for you
* Options may vary by product and licensing agreement. Zoomed Pictures can be adjusted in the Basket.