Fraud Blocker Skip to main content

Merry Men Collection

"Merry Men

Background imageMerry Men Collection: Robin Hood and his Merry Men hunting in Sherwood Forest

Robin Hood and his Merry Men hunting in Sherwood Forest
Vintage engraving of Robin Hood and his Merry Men hunting in Sherwood Forest

Background imageMerry Men Collection: Robin Hood and his Merry Men, 1859 (mixed media on paper)

Robin Hood and his Merry Men, 1859 (mixed media on paper)
CH402201 Robin Hood and his Merry Men, 1859 (mixed media on paper) by Warren, Edmund George (1834-1909); 61x82 cm; Private Collection; Photo eChristies Images; English, out of copyright

Background imageMerry Men Collection: Robin Hood (litho)

Robin Hood (litho)
XJF328378 Robin Hood (litho) by Hope, Robert (1869-1936); Private Collection; English, out of copyright

Background imageMerry Men Collection: Robin Hood, from Peeps into the Past, published c. 1900 (colour litho)

Robin Hood, from Peeps into the Past, published c. 1900 (colour litho)
STC213525 Robin Hood, from Peeps into the Past, published c.1900 (colour litho) by Trelleek (fl.c.1900); Private Collection; (add.info)

Background imageMerry Men Collection: Robin Hood and his Merry Men (colour litho)

Robin Hood and his Merry Men (colour litho)
3099466 Robin Hood and his Merry Men (colour litho) by Trelleek (fl.c.1900); Private Collection; (add.info.: Illustration for Robin Hood and his Merry Men (Raphael Tuck)

Background imageMerry Men Collection: He bound the Abbot to a tree, illustration from Chap-books of the Eighteenth

He bound the Abbot to a tree, illustration from Chap-books of the Eighteenth
489671 He bound the Abbot to a tree, illustration from Chap-books of the Eighteenth Century by John Ashton, pub. 1882 (litho) by English School

Background imageMerry Men Collection: Robin Hood and his Merry Men (colour litho)

Robin Hood and his Merry Men (colour litho)
3099468 Robin Hood and his Merry Men (colour litho) by Trelleek (fl.c.1900); Private Collection; (add.info.: Illustration for Robin Hood and his Merry Men (Raphael Tuck)

Background imageMerry Men Collection: Robin Hood and his Merry Men (colour litho)

Robin Hood and his Merry Men (colour litho)
3099460 Robin Hood and his Merry Men (colour litho) by Trelleek (fl.c.1900); Private Collection; (add.info.: Illustration for Robin Hood and his Merry Men (Raphael Tuck)

Background imageMerry Men Collection: Robin Hood and his Merry Men (colour litho)

Robin Hood and his Merry Men (colour litho)
3099455 Robin Hood and his Merry Men (colour litho) by Trelleek (fl.c.1900); Private Collection; (add.info.: Illustration for Robin Hood and his Merry Men (Raphael Tuck)

Background imageMerry Men Collection: Robin Hood and his Merry Men (colour litho)

Robin Hood and his Merry Men (colour litho)
3099469 Robin Hood and his Merry Men (colour litho) by Trelleek (fl.c.1900); Private Collection; (add.info.: Illustration for Robin Hood and his Merry Men (Raphael Tuck)

Background imageMerry Men Collection: Robin Hood and his Merry Men (colour litho)

Robin Hood and his Merry Men (colour litho)
3099464 Robin Hood and his Merry Men (colour litho) by Trelleek (fl.c.1900); Private Collection; (add.info.: Illustration for Robin Hood and his Merry Men (Raphael Tuck)

Background imageMerry Men Collection: Robin Hood and his Merry Men (colour litho)

Robin Hood and his Merry Men (colour litho)
3099463 Robin Hood and his Merry Men (colour litho) by Trelleek (fl.c.1900); Private Collection; (add.info.: Illustration for Robin Hood and his Merry Men (Raphael Tuck)

Background imageMerry Men Collection: Robin Hood and his Merry Men (colour litho)

Robin Hood and his Merry Men (colour litho)
3099462 Robin Hood and his Merry Men (colour litho) by Trelleek (fl.c.1900); Private Collection; (add.info.: Illustration for Robin Hood and his Merry Men (Raphael Tuck)

Background imageMerry Men Collection: Robin Hood, Scarlet and John (engraving) (b / w photo)

Robin Hood, Scarlet and John (engraving) (b / w photo)
XJF145605 Robin Hood, Scarlet and John (engraving) (b/w photo) by English School, (19th century); Private Collection; English, out of copyright

Background imageMerry Men Collection: Robin Hood and the Bishop (engraving) (b / w photo)

Robin Hood and the Bishop (engraving) (b / w photo)
XJF145604 Robin Hood and the Bishop (engraving) (b/w photo) by English School, (19th century); Private Collection; English, out of copyright

Background imageMerry Men Collection: Robin Hood and King Richard I (1157-99) (engraving) (b / w photo)

Robin Hood and King Richard I (1157-99) (engraving) (b / w photo)
XJF145603 Robin Hood and King Richard I (1157-99) (engraving) (b/w photo) by English School, (19th century); Private Collection; English, out of copyright


All Professionally Made to Order for Quick Shipping

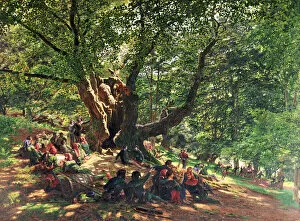
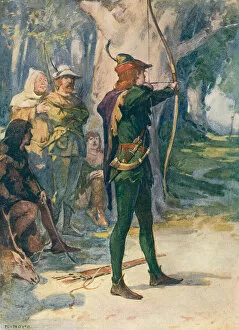
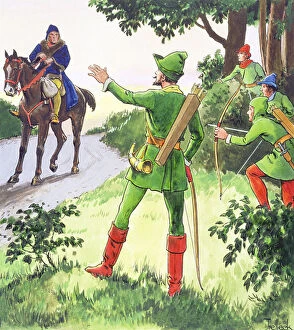
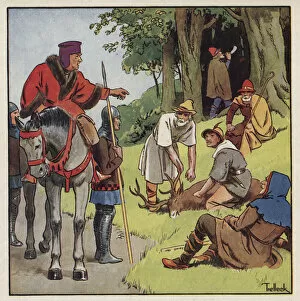
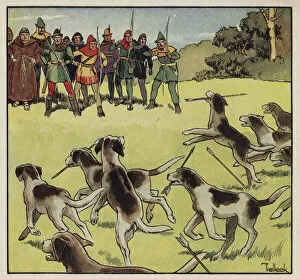
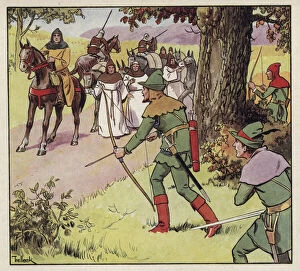
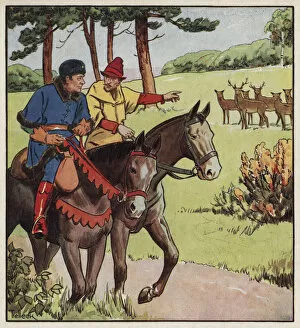
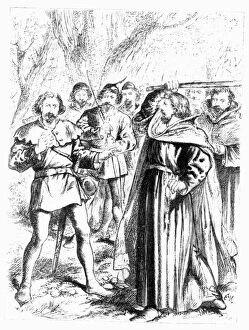
"Merry Men: The Legendary Outlaws of Sherwood Forest" Step into the enchanting world of Robin Hood and his Merry Men as they embark on daring adventures in the heart of Sherwood Forest. With their bows drawn and arrows ready, these valiant heroes fight for justice against corrupt nobles and defend the oppressed. In a captivating mixed media artwork from 1859, we witness Robin Hood leading his band of merry outlaws through dense foliage. Their camaraderie is palpable as they strategize their next move, united by a common goal to restore balance to an unjust society. A lithograph captures the essence of Robin Hood's character - a charismatic leader with unwavering determination. Published around 1900, this colorful depiction showcases our hero in action, fearlessly confronting those who exploit the weak. One cannot forget the iconic scene where Robin Hood binds an Abbot to a tree. This illustration from Chap-books of the Eighteenth Century transports us back in time, highlighting both his cunning wit and compassionate nature towards those suffering under oppressive rule. The vibrant lithographs that follow depict countless instances where Robin Hood and his Merry Men come together to challenge tyranny head-on. Each image exudes energy and excitement as they engage in thrilling escapades while remaining true to their noble cause. Through these visual representations spanning different eras, we are reminded of how this timeless tale continues to captivate audiences across generations. The legend lives on as people are drawn into Sherwood Forest alongside these legendary outlaws who embody bravery, loyalty, and hope for a better world. Join us on this extraordinary journey with Robin Hood and his Merry Men – immerse yourself in their tales filled with adventure, valor, and triumph over injustice.