
Buddha Collection (page 8)
"Buddha: A Journey of Enlightenment and Compassion" Discover the essence of Buddhism through captivating artworks from across Asia


All Professionally Made to Order for Quick Shipping
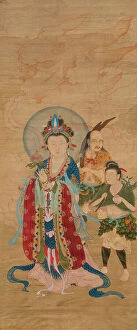
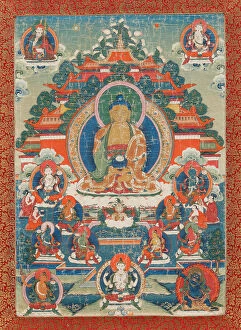
"Buddha: A Journey of Enlightenment and Compassion" Discover the essence of Buddhism through captivating artworks from across Asia. Immerse yourself in the serene beauty of a painting depicting Avalokitesvara, the Buddha of Compassion, in Kathmandu, Nepal. Marvel at the intricate details of a mandala on a Tibetan thangka, transporting you to Bhaktapur's spiritual realm. Witness the divine presence of Padmasambhava statue at Kathok Wodsallin Gompa in Yuksom, Sikkim. Feel his wisdom radiate as he guides seekers on their path to enlightenment. Admire Amitabha, the Buddha of Sukhavati's Western Pure Land, captured by an unknown artist around 1700 - a testament to timeless devotion. At Kopan Monastery in Kathmandu, encounter Manjushri - revered for bestowing knowledge upon devotees seeking intellectual growth and understanding. Explore beyond Buddhism as we pay homage to Laotzu and Confucius alongside Buddha himself - symbols of wisdom that transcend time and borders. Delve into symbolism with a Thangka portraying White Tara goddess; her image represents longevity and protection against adversity. Witness Phra Mae Thorani twist her long hair while torrents create floods - reminding us that even amidst chaos lies purification and renewal. Marvel at a golden statue featuring a reclining laughing Buddha adorned with countless smaller Buddhas symbolizing joyous abundance and blessings bestowed upon all who seek happiness within themselves. Finally, be captivated by Sujata giving milk rice to Buddha depicted on an exquisite Thangka painting in Bhaktapur. This scene reminds us that acts of kindness can nourish not only our bodies but also our souls. Embark on this visual odyssey through Buddhist artistry – where each stroke tells stories steeped in spirituality and compassion – inviting you to embrace inner peace along your own journey towards enlightenment.